Sunday, October 7, 2012

New Recipes!!!

Since the boys are taking a much needed break from the road, I am now able to cook and bake to my heart's content.  Before, while Andrew was on the road, I would make cookies, but then I'd be "stuck" eating them all.  Not great for the scale!  Now he's home and can help me eat all of my treats.  Here are a few my new favorite (and Andrew approved) gluten free recipes:


Mini Chicken Meatloaf (Gluten Free)
I have found a new love of ground chicken.  Very healthy and very tasty!  It can be a little pricey.  I usually buy in bulk when it's on sale.  You can also substitute ground turkey for this recipe.


 1 lb ground chicken
1/2 c. fine GF breadcrumbs (I toasted 3 slices GF bread and ground in my mini-food processor)
1 large egg white
1 medium carrot
1 small onion
1/4 c. ketchup
1/2 tsp minced garlic
1 tbsp worcestershire sauce
1/2 tsp bay seasoning
1 tsp salt
1/8 tsp pepper

1. Preheat oven to 350 degrees.
2. Combine chicken, egg, and bread crumbs in a large bowl, set aside.
3. Cut carrots and onion into chunks and chop in food processor
4. Add vegetables and remaining ingredients to chicken.  Mix well with hands.
5.  Form meat into 6 small loaves and place on a sprayed baking pan.
6. Combine 1/3 c. ketchup, 1 tbsp worcestershire sauce,  1/2 tsp Hot Shot seasoning.  Spread on top of
    loaves.
7. Bake for 30 minutes, then under broiler for 5 minutes, or until meat is cooked thoroughly.


Cheesy Ranch Potatoes (Gluten Free)
I made this super easy recipe for a recent wiener roast and it was a hit!  Everyone loved it!  Even though it's not all that healthy, it's lower in fat compared to many cheesy potato recipes.

1 pkg (28-30 oz) shredded potatoes
2 containers low-fat sour cream
2 cups 2% cheddar cheese
1 pkg ranch seasoning (check ingredients for wheat fillers)
5 strips of bacon, crumbled
Pepper to taste

1. Combine sour cream, cheese, ranch, and pepper into a large bowl.
2. Stir in potatoes.
3. Spread mixture into a 9x13 sprayed pan.
4. Bake at 350 degrees for 40 minutes.


Chocolate Chip Pumpkin Bread
Fall is here, which  means pumpkin baking has arrived as well!  This recipe is almost to die for and doesn't have any of the grittiness some gluten free baking has.  I ate the entire loaf (minus one piece) in 2 days.  Yes, 2 days!  Let's just say I won't making this one too often unless I have plenty of people to share it with.  Recipe modified from Domestic Dilettante's Sour Cream Pumpkin Bread


1/2 c. butter, slightly softened to smear texture
1 c. splenda
2 eggs
1 tsp vanilla
1 1/2 c. gluten free flour blend (I used Bob's Red Mill)
1 tsp baking soda
1/2 tsp salt
1 tsp cinnamon
1/2 tsp nutmeg
1 c. (1/2 can) pumpkin puree
1/2 c. sour cream or Greek yogurt (I had sour cream on hand)
1 1/2 c. chocolate chips

1. Combine wet ingredients.
2. Combine dry ingredients and add to wet.  Mix thoroughly.  Add chocolate chips.
3.  Spread into prepared loaf pan.  Bake at 350 degrees for 50 minutes, or until knife comes out clean.

Other Variations:
1. Add 1/2 c. preferred nuts in place of or in addition to chocolate chips.
2. Streusel Topping: 1/2 c. brown sugar, 1/2 c chopped nuts, 3/4 tsp cinnamon, 2 tbs butter, crumbled together and sprinkled over the top of the batter before baking.
3. Cream Cheese Glaze- 1/2 c. powdered sugar, 1/2 c. cream cheese softened, 1/2 tsp vanilla, 3 tbs fresh orange juice.  Beat together until smooth.  Drizzle over loaf after removing it from pan.


Tuesday, August 14, 2012

Aunt Lori's Chocolate Chip Cookies- The GF Version

Andrew is on the road for another week, so what is a girl supposed to do with her time?  Make a GF version of her favorite chocolate chip cookie and eat the whole batch since no one else is home, of course!  I love my Aunt Lori's chocolate chip cookies made with pudding.  They are cakey, moist, and great for dunking into milk.....all components a GF cookie usually lacks.  I thought I would try my hand at making a GF version.  Let me tell you.......I don't know if it's because I haven't had a real chocolate chip cookie in 5 months or what, but I better take a second Prilosec for the heartburn.  These treasures are pretty close to the real deal.  (Insert yum yum moaning here)


Aunt Lori's Chocolate Chip Cookies 
(GF Version)

2 1/4 c. Gluten Free Flour Mix
3/4 tsp. Xanthan Gum
1 tsp.    Baking Soda
1 c.       Butter (Softened)
1/2 c.    White Sugar
1/2 c.    Brown Sugar
1 tsp.    Vanilla
2           Eggs
1 small box Sugar Free Vanilla Pudding Mix
2 c.      Chocolate Chips

Combine dry ingredients into small bowl.  Set aside.  Beat butter and sugars.  Add vanilla and pudding.  Beat until smooth.  Add eggs until well combined.  Gradually add flour mixture.  Stir in chocolate chip cookies.  Bake at 325 for 8-10 minutes until slightly golden brown.  Devour with milk.

Tuesday, June 12, 2012

Co-Op Recipes

According to my father, the 11th commandment in the Bible is, "Thou shall not waste food."  His teaching resonated in my mind as I picked up my co-op bag full of fruits and veges and wondered, "What in the world am I going to do with all this food?!?!"  To top things off, Andrew is out of town this week which means I am left to eat it all by myself.  I quickly thought of recipes I could make that included vegetables. The first one that came to mind was my Garden Salsa recipe that my mom makes every summer.  This would get rid of some of the corn, peppers, limes, cilantro, and tomatoes.  There were two vegetables I hadn't ever cooked with- avocados and artichokes.  I don't like avocados, plain and simple.  The only way I've had avocados was in guacamole and sliced.  Eh.  After searching, I found a recipe for avocado pound cake.  Yummy!  Here are the three recipes to use with your co-op produce.  I'm still searching for an artichoke recipe. Maybe I'll donate those to someone at work.  If they throw them out, at least I can tell my dad it wasn't me.


Garden Salsa

This salsa is soooo yummy and nutritious.  
It's also good on fish and as a topping to tacos.

3-4 Tomatoes, diced             
1 Onion, diced             
1 Pepper, diced
1 Ear of Corn, cooked and cut off cob
1 Can Black Beans, rinsed
Pepperocini Peppers, chopped (amount to taste) 
Pepperochini Juice (amount to taste)
2 Tbs. EVOO
Juice of 3 limes
Chopped Cilantro
1 tbs Sugar or Splenda (or to taste)
S&P to taste

Chop all ingredients into medium bowl and stir.  Salsa will seem dry at first, but will "juice up" as time goes on.


Avocado Pound Cake
Modified from Joy the Baker
Makes 2 9x4x3-inch loaves

This cake is super moist and yummy.  It tastes almost like a super sweet cornbread, 
and would be tasty with some chopped strawberries and whipped cream.  
It does turn out a little green, but the taste of avocado is completely hidden.

Tips:
1. For a Gluten Free cake, substitute teh all-purpose flour with gluten free all-purpose flour.  Place batter in cake pans rather than loaf pans, as the cake tends to fall.
2. For avocados that are not ripe yet, place in microwave on 50% power for 30-45 seconds.  Remove flesh and place in food processor to mash.

3 c. All-purpose Flour
1/2 c. Yellow Cornmeal
1/2 tsp. Salt
1 tsp Baking Powder
3/4 c. Unsalted Butter, Softened
2 c. Sugar
1 c. Splenda
4 Large Eggs (room temperature)
2 tsp Vanilla Extract
3/4 c. Buttermilk
3 Small Avocados- just over a cup to a cup and a half of avocado, mashed

Preheat oven to 350 degrees F.  Grease and flour two loaf pans and set aside.
In a medium sized bowl, sift together flour, cornmeal, salt, baking powder and baking soda.  Set aside.  Set the four eggs out on the counter to come to room temperature while you beat the butter and sugar.
In the bowl of a stand mixer, beat butter on medium speed until softened and pliable.  Add the sugar and beat until light and fluffy, about 4 minutes.  Add the avocado and beat another minute to incorporate.  Scrape down the sides of the bowl to ensure that everything is thoroughly mixed.
Add the eggs one at a time, beating 1 minute after the addition of each egg.  Beat in vanilla extract.
Reduce the mixer speed to low and add half of the flour mixture, all of the buttermilk, and then the rest of the flour mixture.  Beat just until combined.
Divide the dough between the two loaf pans and place in the oven.  Turn the oven down to 325 degrees F.   Bake for 40-45 minutes or until a skewer inserted in the center of the cakes comes out clean.  I checked my cakes every ten minutes or so after the 30 minute mark.   Let cool in the pan for 10 minutes, then invert onto a cooling rack to cool completely.


Fruit and Chicken Romaine Salad


There's no real recipe for this one, but I thought I'd used some of my lettuce, strawberries, apples, grapes, and carrots for my salad tomorrow at lunch.  I topped it off with some slivered almonds and will add chicken to it tomorrow.  Yum Yum!


Thursday, May 24, 2012

South Dakota: Traveling with Celiac Disease

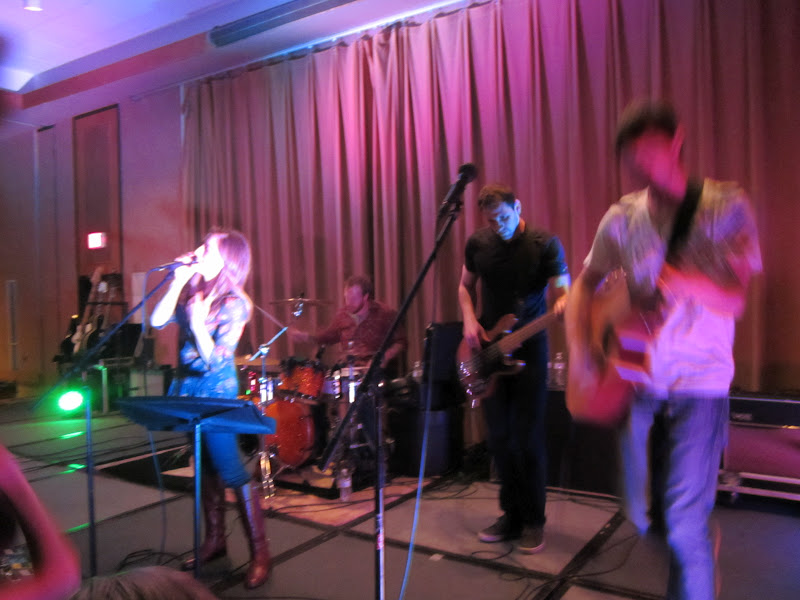
In SD with the boys.  After 5 years of being their roadie, 
they finally let me on stage!

Four days before leaving for South Dakota with the boys, I found out that I had Celiac Disease.  What is a gal supposed to eat if your only options are gas station and fast food?  Here are a few tips that helped me while road tripping with 4 guys to South Dakota:

1.  Do your homework. When first starting your gluten free diet, research restaurants you frequently go to and find out what gluten free items they  have to offer.  I also downloaded The Gluten Free Guide To Fast Food onto my e-reader, which provided me a list of foods I could eat at some popular fast food restaurants. This e-book was a great help for those quick eating stops. There are also many apps to download.  Find Me Gluten Free is one of my favorites.

2.  Think ahead.  Plan ahead.  I knew there would be times where I wouldn't be able to eat what the boys were eating.  Many exits only have a few restaurants to choose from.  Stops such as Subway, McDonalds, and Quiznos don't offer a wide variety of gluten free foods to choose from, and I couldn't expect them to stop at Wendy's every time so that I could get a baked potato.  To help prevent the "I can't eat anything, but I'm so hungry, I hate being gluten free, I'm crying, and now I've made a scene" meltdown, I packed a cooler with lean lunch meat, string cheese, strawberries, and GF bread to make sandwiches and a quick picnic type meal.  I also brought heat and eat rice cups, applesauce, GF protein bars, apples, peanut butter, and GF cereal.  All foods that are easy to pack and easy to prepare in the back of a 13 passenger van.

3. Don't be shy- Request GF meals from the caterer.  The boys were playing for a weekend youth retreat at a hotel/conference center.  The conference center was providing three out of the five meals.  The two meals not provided were pizza and KFC.  (That's where my picnic lunches came in.)  Soon after we arrived at the hotel, I called the front desk and was able to speak with the chef who then told me the items on the breakfast menu that were gluten free and also offered to prepare me a meal that was GF.  They were so much more helpful than I thought they would be.  I felt silly asking him if he could read the ingredients listed on the sausage box, but he was very patient and understood my needs.

4.  Use this opportunity to educate others.  When being diagnosed, I didn't want to be labeled "one of those people."  You know, the one who makes a scene at restaurants because they have to tell the waitress EXACTLY how to prepare their food.  Or the ones who freak out if a crouton even slightly touches their salad.  Well, I have come to the conclusion that I will be "one of those people", but this is also a great opportunity to educate others that Celiac Disease isn't an allergy, eating gluten free isn't just a trendy diet I'm trying out, but that it is a real autoimmune disease that can potentially lead to life threatening diseases if not treated.

I hope these tips help you as they helped me on my travels with the boys.

No More Mama's Noodles?????

For years I've had tummy trouble.  Ulcers starting in 8th grade, caused by cheerleading try-outs, piano recitals, pharmacology, and nursing boards.  Then since high school, I have always felt bloated, had stomach cramps, heartburn, and would get sick in the middle of the night for no reason.  It finally came to the point where I would tell Andrew my stomach hurt, in which he would respond, "What's new?"  (Thanks, for the sympathy pal!)   He really did feel bad for me and encouraged me to see the doctor.  If you know a nurse, who have come to realize that we are the worst patients.  So I waited a few more years.

After I had diagnosed myself with gallbladder trouble, IBS, chronic appendicitis, and many other diseases, I went to a wonderful gastrointerologist.  After telling him my GI history, he asked me if I had ever been tested for Celiac Disease.  I had been to a GI doctor when I was in high school and remembered him doing some nuclear test that looked for an egg shaped something, I had had 2 upper GI tests, but I didn't think I had been tested for celiac.  He ordered some blood tests and told me he'd call with results in a week.  After a week of waiting and looking up what Celiac Disease was (an auto-immune disorder where the body attacks the small intestine if gluten (a protein found in wheat, barley, and rye) is ingested, resulting in malnourishment, GI discomfort, and can ultimately lead to cancer), I received the call at work that I had tested positive.  Normal is below 20, moderate chance is 21-30, almost positively for sure you have it is >30.  Mine was 72.  The nurse told me to go ahead with my normal diet and scheduled an EGD for the next week..   My first thought: "But what about Mama's noodles and rolls?  And Monical's pizza?"  I immediately texted my praying friends and family with a text that read, "Please say a prayer.  I tested positive for Celiac Disease.  Please pray that it is a false positive so that I can still eat my mama's noodles.  Thanks."  Maybe a little bit of a selfish prayer, but you haven't had my mama's noodles!   My second thought: "I'm going to eat anything and everything that has wheat until my EGD when they give me the for sure positive."  I gained 3 or 4 pounds in those two weeks of waiting.  I ate cookies, pizza, pasta, breadsticks, cake, etc.  I also had some belly aches those two weeks.  My third thought: "I can't cry.  I'm at work.  I have 6 patients to take care of and some blood to hang."  That week, I had also taken care of a 19 year old with newly diagnosed crohn's disease and was going for his first colectomy, a 24 year old with a small bowel obstruction and colectomy, and a 50 year old man with a colostomy related to an intestinal disorder.  Celiac disease would not be the end of the world.

The day finally came when the office called said it was a for sure.  Start a gluten free diet today.  (I was actually on my way to get chicken noodle soup and a bread stick.  I ended up getting a chicken salad)  And this is where my story begins.....The Life of a Band Wife....Who Happens to Have Celiac Disease.

Tuesday, August 23, 2011

To Do Board


My secret sister at church is beautiful, kind, caring, is in college, and lives in an apartment that is very brightly decorated. I wanted to make her something for the start of the school year that would go with her decor, but also be useful. I've been seeing diy dry erase boards on Pinterest and wanted to try my hand at it. This is what came out of it:

Supplies needed:

$3 ugly picture frame from Goodwill
$1 can of white spray paint
2 sheets of scrapbook paper from your pile of scrapbook paper that's not ever going to be used
Hot glue gun
Ribbon from your bridal shower that was 2 years ago
Brown paper bag

1. Start with your $3 ugly picture from Goodwill. Remove backing, picture and glass from frame. Lay frame on top of the brown paper bag and spray paint. It might need to do this a couple of times.
Picture before.

2. While paint is drying, make your "picture." My goodwill picture was glued to two borders and backing. I flipped the picture over to the backing side and pasted my paper on the smooth surface. My backing and frame were larger than my paper, so I added another sheet of paper to make the border. I first measured my center paper and determined how wide my border needed to be. I then stick glued strips for the border and then added the full sheet.


Like this!


3. Put your frame and picture back together. I wanted to add a little more pizzazz, so I added ribbon I had stuck in my closet since my bridal shower 2 years ago. Hot glue the ribbon to the back of the frame. Cover the back of the frame with packing paper for a cleaned, finished look.


4. Ta-Da! It's done. That's it! It really only took me 10 minutes to make (not counting drying time) and cost me $4. I hope she likes it!


P.S.
My secret sister totally knows who I am. It's ok if she sees this :)

Monday, August 22, 2011

Freezer Meals- Chicken Style!


I must confess. I'm tired of last minute, throw together meals. I only work three days a week, but on those three days, I leave at 5:30 am and get home at 8:
30 pm. This usually means Andrew and I fend for ourselves, or something quick is made- usually spaghetti (Not knocking your spaghetti Andrew. I appreciat
e you making supper and you do a great job at it.) I just need a little variety. I decided to try my hand at freezer meals.

Disclaimer: I have never tried freezing and then baking these recipes. Hopefully they work. Also, I played a lot of these by ear- sometimes making for great results and sometimes not so awesome.

I started by using 14 lbs of boneless skinless chicken breasts. I got an awesome sale on them $1.88/lb. I usually pay over $2/lb- and that's for frozen.


Before I started any of the recipes, I grilled 12 of the 14 lbs of chicken with a little steak seasoning (I left 2 or3 lbs for the Italian Chicken). This is a healthier approach and I'm not dirtying extra pans. I can also cook a lot of chicken at once, saving time. I then shredded all of the chicken with 2 forks. Make sure to shred the chicken while it's still warm. It will make the job much easier!

My first recipe was the easiest and most simple:

Italian Chicken

4 boneless skinless chicken breasts
1 packet Italian dressing mix
1- 16 oz jar banana peppers


1. Combine all ingredients into your crock pot. Cook on high for 4 hours, or low for 6-8.


2. After chicken is cooked, shred and place in freezer zip-lock bags. You can also increase this recipe to make more. I used 6 chicken breasts, 1 jar of peppers, and 1 1/2 packets of seasoning, making 2- 1 liter bags of chicken.


For serving: Thaw chicken in refrigerator or microwave. Heat through and serve on toast or buns. The chicken can also be used in soups, on salads, in tortillas....the options are endless.


Baked Spaghetti with Chicken

3 lbs spaghetti
shredded chicken
4 jars spaghetti sauce
1 package mozzarella cheese


1. Boil pasta and drain. Drizzle olive oil or butter to prevent sticking.


2. Place spaghetti in aluminum pans. This recipe made 2 large pans and one smaller pan. Pour 1 1/2 jars of sauce for each large pan and 1 jar for the smaller pan. The spaghetti may require more or less sauce- just eyeball it, but make sure you use plenty of sauce. The spaghetti tends to soak it up. Add chicken (eyeball this too) and combine. Sprinkle with mozzarella cheese. Cover with plastic wrap (to help prevent freezer burning) and then foil.

3. To serve: Defrost overnight for an evening meal the next day. Bake with foil on (don't forget to remove the plastic wrap first). When spaghetti is almost heated through, remove foil and bake until cheese is melted. Serve with bread and salad.


Chicken Fajita Enchiladas

I made these for my brother and sister-in-law one day after church. That time I used leftover grilled pork tenderloin. They loved them, I loved them, and Andrew really loved them. I hope they freeze just as well!

3 green pepper
2 onions
1 tbs oil
Shredded chicken
1 packet taco seasoning
20- 10 inch tortillas
1 packet shredded mexican style cheese
1 jar salsa


1. In a large pan, heat oil until very hot. Add peppers, onion, and chicken. Cook until peppers still have a little crispness to them. Add seasoning packet and a small amount of water. Stir until chicken and vegetables are coated.


2. Fill each tortilla with mixture, add cheese, and roll. Place tortillas seam side down. Each large pan should fit 10 tortillas. Spray tortillas with cooking spray for extra crispness when baked.


3. To prevent sogginess, place salsa and cheese in 2 separate freezer bags for each pan. Plastic wrap and foil.


To serve: Thaw overnight. Serve with Chipotle Style Rice, baked tortilla chips, salsa, and fat-free refried beans.


BBQ Chicken
Please note on this recipe: I have no idea how it tastes. I'm a little skeptical. You could also just combine chicken and a bottle of bbq sauce and it would be just as good. But...if you want to try to be super home-makerish, use this recipe and cross your fingers.

1 1/2 c ketchup
3/4 c spicy brown mustard
1 onion
1/4 c lemon
2 tbs apple cider vinegar
1 tbs Worcestershire sauce
1 tbs brown sugar
1/2 c water
2 tbsp grill seasoning
Shredded chicken
1. Combine all.


2. Place chicken into 1 gallon freezer bags (makes 2 bags). For low mess, place bag into a blender. Fold bag over the sides and fill. Genius!


In the end, I made 2 bags Italian Chicken, 3 pans Bakes Spaghetti, 2 pans Chicken Fajita Enchiladas, and 2 bags BBQ Chicken. It took only 3 hours and not very many pans. And I'm very tired of chicken :). Maybe we'll save these meals for next week!